On-premise MS Exchange Server Restore
On-premise MS Exchange Server Restore
IDrive's MS Exchange Server restore supports the restore of Microsoft Exchange Server 2010, 2013 and 2016 to the Original server database or to a Recovery database. The Recovery database allows you to mount a copy of the regular mailbox database backup for performing a restore of mailbox or mailbox items. Restoring the mailbox to a Recovery database will not have an impact on the active copy of the mailbox database that is already running.
To restore to original location,
Dismount the mailbox store/database and change mailbox database properties.
Steps to dismount database and change mailbox database properties on MS Exchange Server 2013:
Steps to dismount database and change mailbox database properties on MS Exchange Server 2013:
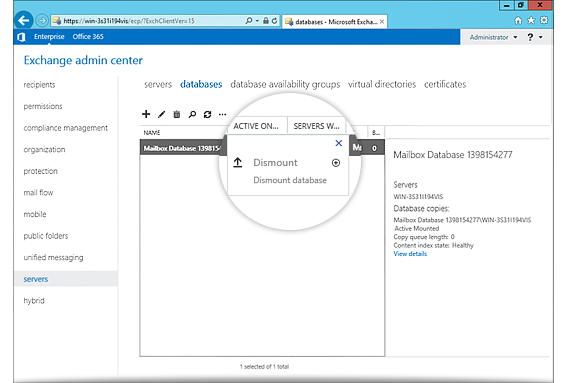
- Open Exchange Control Panel and select the 'databases' in Exchange Admin Center.
- Select the 'Mailbox' database from 'servers' that needs to be restored and choose the 'Dismount database' from the 'More' option.
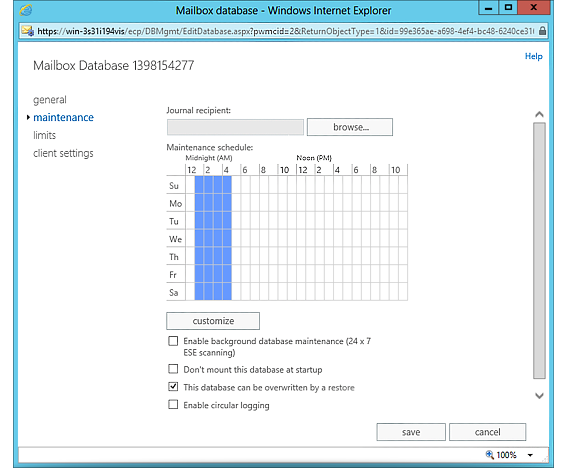
- Double-click the Mailbox database and choose the 'maintenance' tab from 'Properties' window.
- Select the 'This database can be overwritten by a restore' option and click the 'save' button.
Perform steps 'c' and 'd' listed above for all databases that need to be restored.
Note: Once the above mentioned steps are executed, close the 'Exchange Control Panel' before initiating the restore operation.
- Once the databases have been dismounted, sign in to the IDrive® application and click 'Restore'.
- Select 'Online Restore', or 'Local Restore', or 'IDrive Express™ Restore'.
- Browse and select the 'IDriveExchBackupset' folder in your IDrive® account or local drive.
Note: If 'Local Restore' is selected, you can choose the required version from the 'Version' list. - Click 'Restore Now', to restore the 'IDriveExchBackupset' folder to the local computer.
Note: The 'IDriveExchBackupset' folder selected for restore should be in the same path as it was while performing the backup operation. - Once the folder has been successfully restored, click 'Server Backup.' A slider menu will appear.
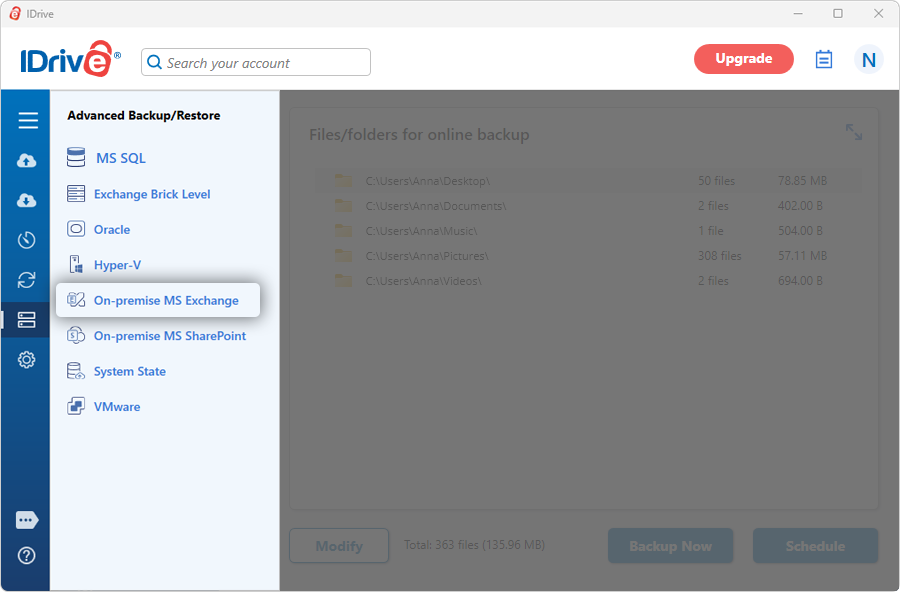
- Click 'On-premise MS Exchange.' The MS Exchange backup/restore console appears.
- Click 'MS Exchange restore'.
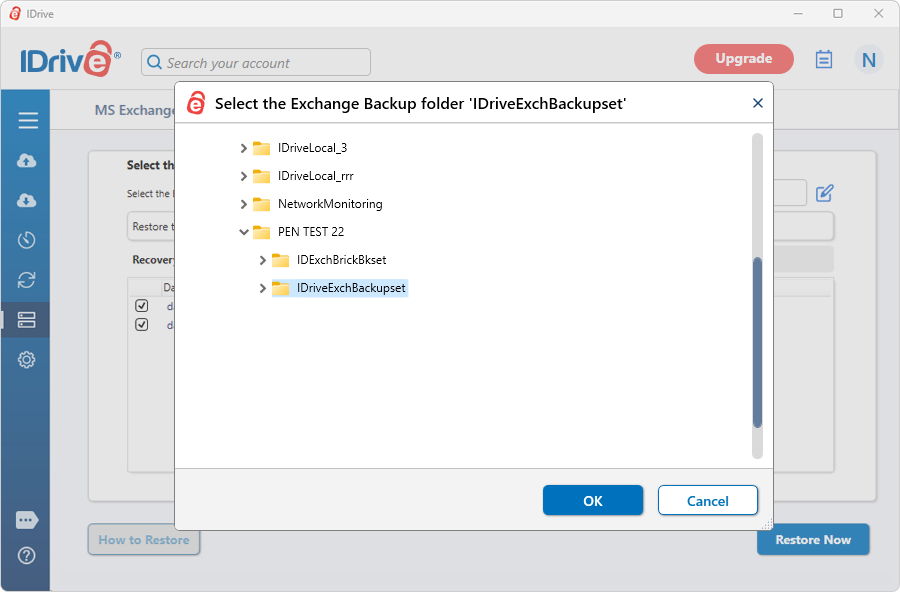
- Browse and select the 'IDriveExchBackupset' folder (restored earlier from your IDrive account or local drive).
- Click 'Restore Now'.
- Click the 'Restore' button.
Note:- It is advisable that a qualified database administrator carries out the data restore.
- The restore operation overwrites the existing databases on the MS Exchange Server.
- Before initiating the restore operation, do take an offline backup of MS Exchange Server databases that need to be restored.
- Do not interrupt the operation during the process.
- On completion of MS Exchange Server restore, the restored databases (the 'Public Folder' store/ 'Mailbox' stores) are automatically mounted.
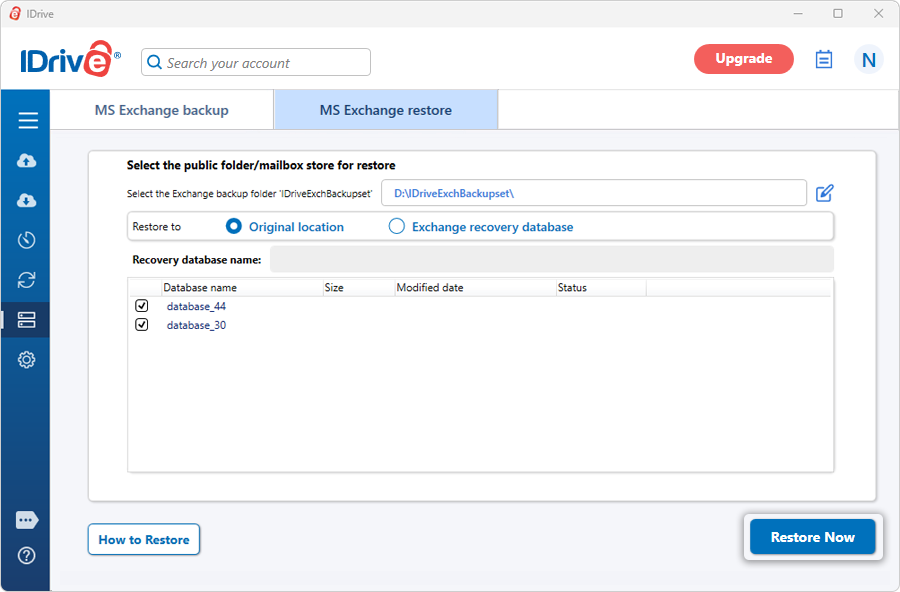
To restore to recovery database,
- Create Recovery Database using the Exchange management shell by executing the following command:
New-MailboxDatabase -Recovery -Name <database name> -Server <servername> -EdbFilePath <path> -LogFolderPath <path>Note: If Recovery database already exists, then dismount the database using the following command: Dismount-Database <"database name">
Example: New-MailboxDatabase -Recovery -Name RDB2 -Server MBX1 -EdbFilePath "C:\Recovery\RDB2\RDB2.EDB" -LogFolderPath "C:\Recovery\RDB2"
- Set the File restore for Exchange server recovery database using the following command:
Set-MailboxDatabase -Identity <database name> -AllowFileRestore $true - Once the databases are dismounted, sign in to the IDrive application and click 'Restore'.
- Browse and select the 'IDriveExchBackupset' folder in your IDrive account or local drive.
- Click 'Restore Now', to restore the 'IDriveExchBackupset ' folder to the local computer.
Note: The 'IDriveExchBackupset' folder selected for restore should be in the same path as it was while performing the backup operation. - Once the folder has been successfully restored, click 'Server Backup'. A slider menu will appear.
- Click 'On-premise MS Exchange'. The MS Exchange backup/restore console appears.
- Click 'MS Exchange restore'.
- Browse and select the 'IDriveExchBackupset' folder (restored earlier from your IDrive account).
- Click 'Restore'.
View the steps to backup MS Exchange Server.