Managing Disk Space Before Restoring Image File
Knowledge Base
Managing Disk Space Before Restoring Image File
Disk Clone retains the information and structure (including partition) of the backed up drive. During the restore process, it ensures that the image drive is recovered as is, and hence it makes the space on the destination drive to match its own size.
For example, if you restore a 100 GB drive / system image file to a 500 GB hard drive partition, your partition will shrink to a 100 GB drive after the recovery. To handle this storage shrink, create the destination partition the same as that of drive / system image file size that you wish to recover. You may refer to the below steps for re-partitioning.
Steps to re-partition the destination drive, before image file restore:
- Right-click the image file (IDriveDiskImage.img), click 'Properties', and note its file size.
- Go to 'Control Panel' > 'Administrative Tools' > 'Computer Management', and on the left pane, click 'Disk Management' under 'Storage'.
Note: A simpler method to launch the Disk Manager is to go to the 'Run' command window and execute diskmgmt.msc. - In the lower section, right-click the destination drive for restoring the image file, and click 'Shrink Volume'. The 'Shrink <drive>' popup appears.
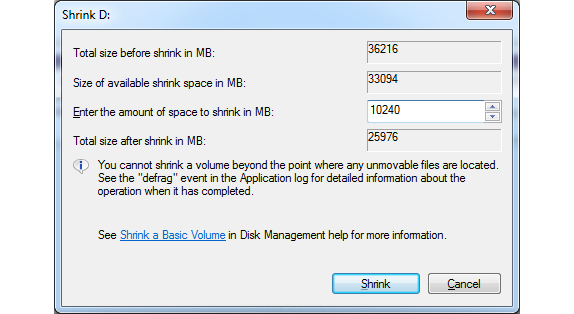
- Enter the space you need on the newly partitioned drive (in megabytes), sufficient enough to restore the image file, and click 'Shrink'. An unallocated drive appears.
- Right-click the unallocated drive, click 'New Simple Volume' and follow the wizard. A new drive will be created.
You can now restore your image file to the newly created partition.