How do I install the Asustor Backup App on my Asustor NAS device?
To install the Asustor Backup App on your Asustor NAS device,
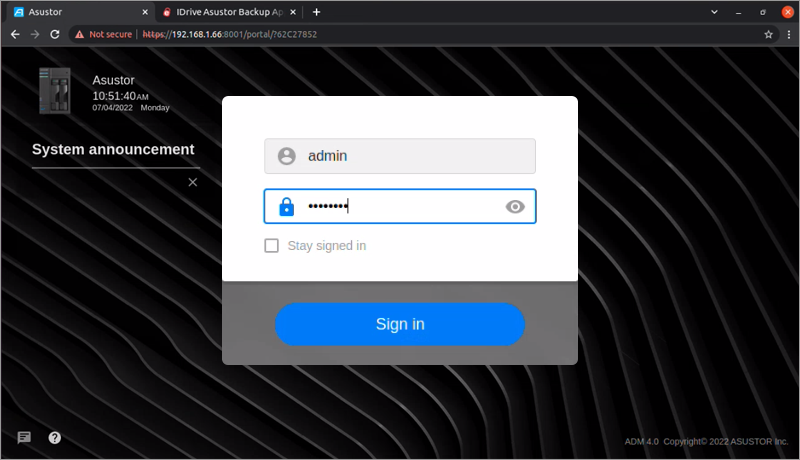
Login to your Asustor NAS device as 'admin'.
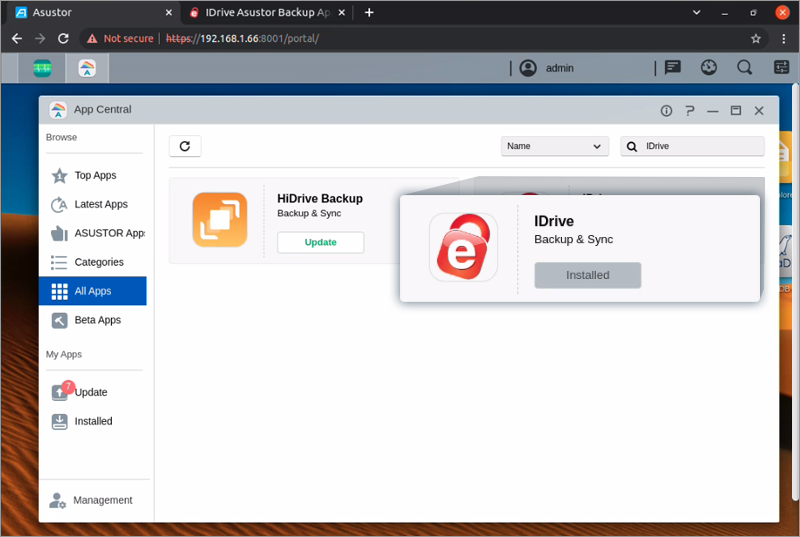
Navigate to 'App Central' > 'All Apps'.
Search for Name 'IDrive'.
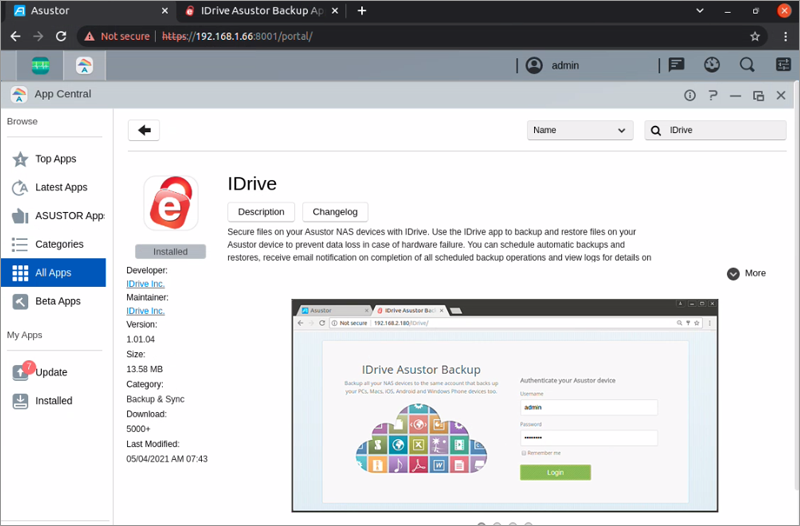
Click the IDrive Thumbnail and go to the details page.
Click 'Install'. After installation, the IDrive App will be listed in the 'App Central' under 'My Apps' > 'Installed' tab.
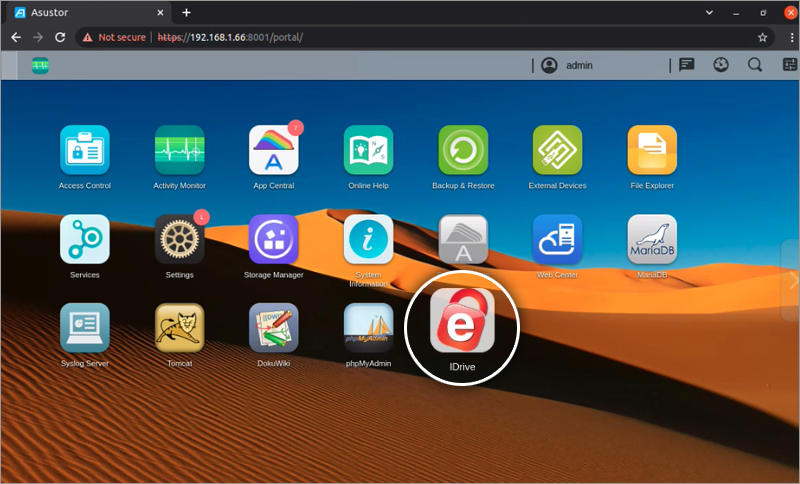
To start the application, click 'IDrive App' > .
How can I install the Asustor Backup App on my Asustor NAS device if the latest version is not available in the Asustor App Center?
Yes, you can install the Asustor Backup App on your NAS device.
The Asustor Backup App is packaged as an APK. Before installing the Asustor Backup App on your NAS device, ensure the installation prerequisites are met.
To install,
Login to your Asustor NAS device as 'admin'.
Download APK and save the appropriate installer for your Asustor device.
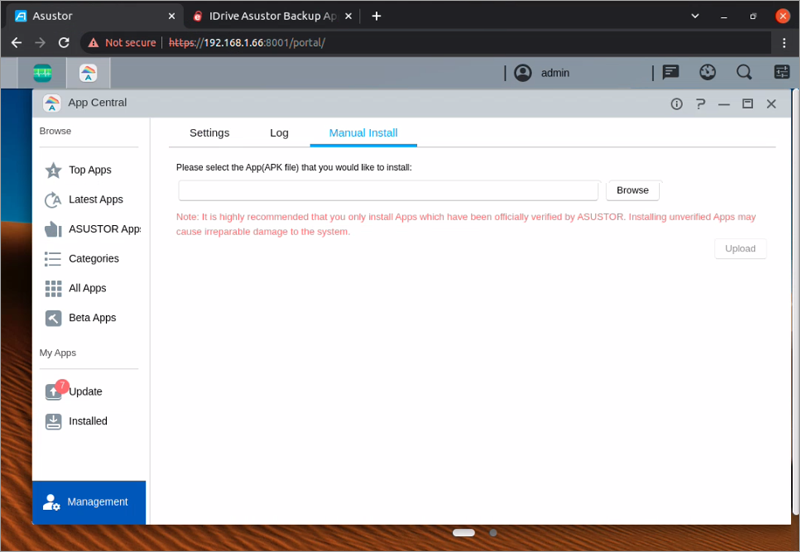
Navigate to 'App Central' > 'Manual Install'.
Click 'Browse' and select 'IDrive APK'.
Click 'Upload'.
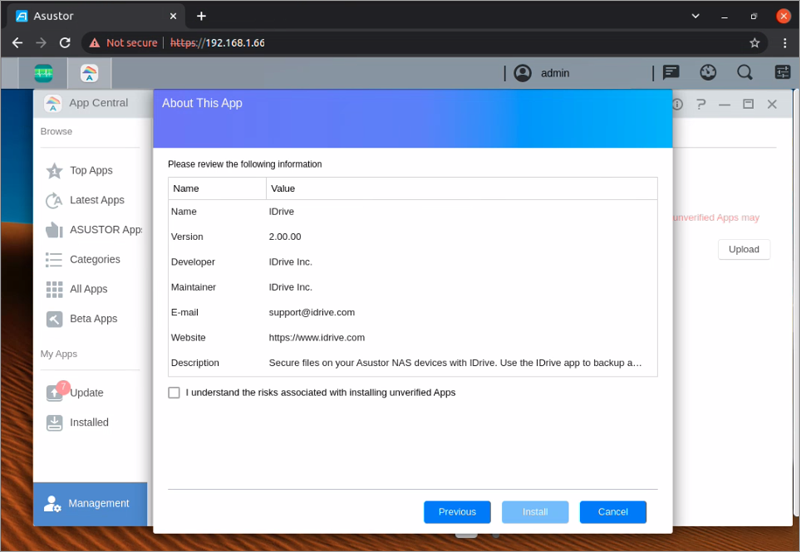
The 'About This App' screen appears.
In the 'About This App' screen, click the check box and click 'Install'.
I need to launch and use the Asustor Backup App. How can I do that?
To launch the Asustor Backup App,
Login to your NAS device.
Click to launch the app from Asustor Home page.
You will be redirected to the IDrive Asustor Backup app login page.
Enter your NAS device credentials and click 'Login'.
If you had set up the 2-step verification with your NAS device, select the 'Have 2-step verification?' check box. Enter the 6-digit code.
Enter your IDrive 'Username' and 'Password' and click 'Login'.
Note: If you had set a private encryption key for your account, on clicking 'Login', it will redirect to the 'Encryption Key' page. Enter your Encryption Key and click 'Continue'.
The Asustor Backup App launches and the following tabs are available:
Backup: Enables you to backup data from the Asustor device to your IDrive account.
Restore: Enables you to restore data from your IDrive account to the Asustor device.
Scheduler: Allows you to manage your scheduled backup jobs.
Log: Enables you to view the status of your backup and restore operations.
Express Backup: Enables you to perform an immediate express backup of your files and folders.
Can I perform manual backup/restore operations?
Yes, you can perform manual backup/restore operations via the Asustor app.
To manually backup or restore,
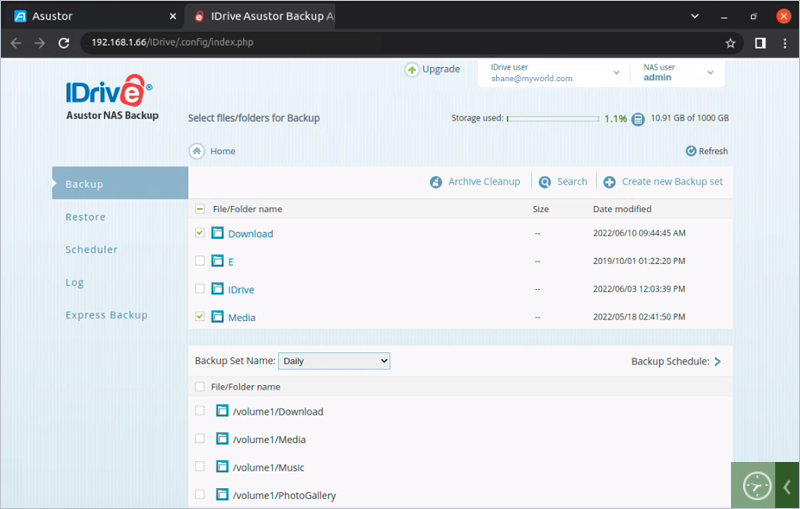
Click the 'Backup'/'Restore' tab and select the files/folders you wish to backup/restore manually.
Click next to backup/restore location to specify a different backup/restore location.
Click 'Backup Now'/'Restore Now'.
You can stop the ongoing backup/restore operation by clicking 'Stop Backup'/'Stop Restore'.
You can exclude individual files/folders (for e.g. file extension like tmp), which may be part of the backup set, from being backed up to your account. From the 'Select files/folders for Backup' list, click the drop-down arrow against the respective file/folder and click 'Add to Exclude List'.
Note: For certain accounts, users may have to enter the backup location name manually.
How to create a new scheduled backup?
Yes, you can create a new scheduled backup.
To create,
Click the 'Backup' tab and then click 'Create new backup set'.
In the 'Backup Set Name' field, enter a name for the new backup job.
Select the file(s)/folder(s) to backup.
To view the file(s)/folder(s) you have selected for backup, click the 'Selected files/folders list' tab.
To remove a selection from the backup list, select the file/folder and click .
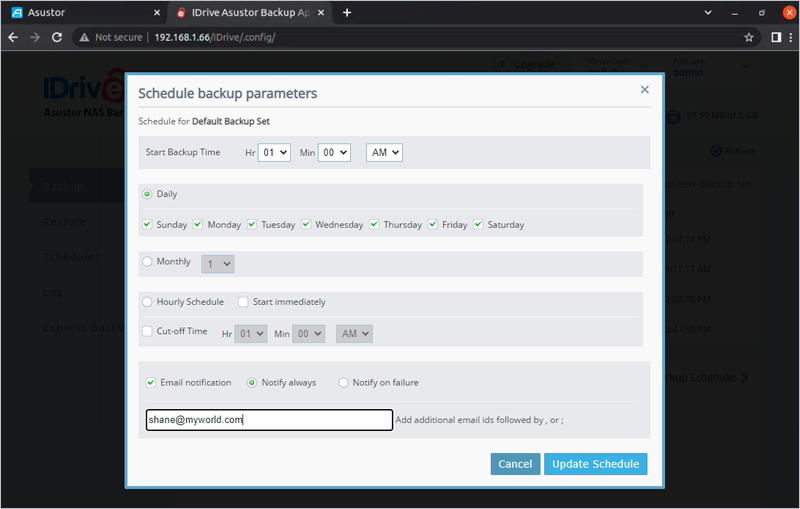
Click 'Schedule Backup'. The 'Schedule backup parameters' window appears.
Select the settings for schedule backup (Hourly, Daily, and Monthly) and click 'Update Schedule'.
Select 'Email notification' and enter an email address to receive backup notifications.
Note: You can create a maximum of five backup sets.
How can I edit an existing scheduled job?
To edit an existing scheduled job,
Click the 'Scheduler' tab and the list of all existing jobs appear.
Click the job you want to edit and the schedule parameters for that job appears.
Edit the schedule settings and click 'Update Schedule'.
How can I cancel a scheduled job?
To cancel a scheduled job,
Click the 'Scheduler' tab and the 'Manage All Scheduled jobs' window appears.
Click , corresponding to the job you want to cancel.
I want to check the failed file/folder names and the reason for backup failure. Can I do that?
Yes, you can see the failed file/folder name and the reason for backup failure.
To check,
Click the 'Log' tab and the 'Logs' window appears.
Under 'Details', click for a particular job, which is failed. The 'Detailed log' screen appears.
Under the 'Error Report' section, you can view the name of files and folders that have failed during backup and the reason for failure.
Can I delete a backup job?
Yes, you can delete an existing backup job.
To delete a job,
Click the 'Scheduler' tab and the 'Manage All Scheduled jobs' window appears.
Click, corresponding to the job you want to delete.
Is there a way to change the default location for my backup jobs?
Yes, you can change the default location for your backup jobs.
To change,
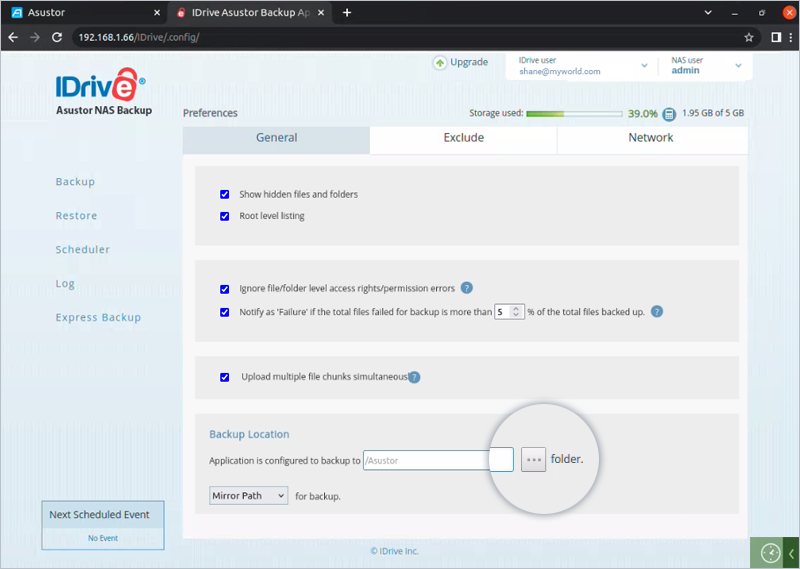
Login to the Asustor Backup App, click the username on the top-right corner, and then click 'Preferences'.
Under the 'General' tab, click to change the backup location.
Select the new backup location on your account.
Note: For some accounts, sections like backup location and mirror path will not be available.
I need to change my restore location. Is it possible?
Yes, you can change your restore location.
To change,
Login to the Asustor Backup App, click the 'Restore' tab.
Click and the 'Select your restore location' window appears.
Select the new restore location and click 'OK'.
What is Mirror and Relative Path Backup?
The 'Mirror Path Backup' option replicates the file/directory hierarchy present on the Asustor system to your IDrive account. By default, the 'Mirror Path' option is enabled. For example, if you select to backup the file 'bin' from 'root/opt/bin' with mirroring option selected, then IDrive will maintain the same directory structure in your online IDrive account as 'ShanePC/root/opt/bin'.
The 'Relative Path Backup' option will not replicate the directory hierarchy of the file as it exists on your Asustor system, but instead it would just backup the file to the selected folder on your IDrive account. For example, if you select to backup the file 'bin' from 'root/opt/bin' with the 'Relative Path' option selected, IDrive will maintain the directory structure in your online IDrive account as 'ShanePC/bin'.
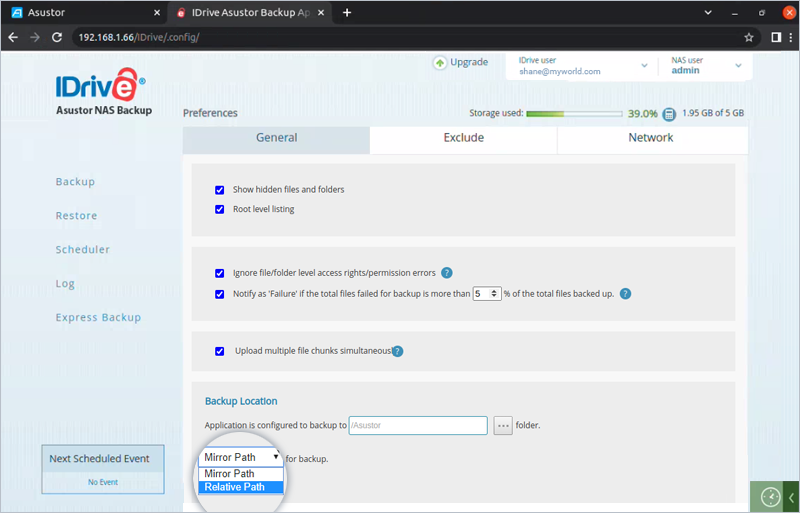
To enable Relative Path backup,
Login to the Asustor Backup App, click the username on the top-right corner, and then click 'Preferences'.
Click the 'General' tab and the 'Backup Location' window appears.
Click the drop-down menu and select 'Relative Path'.
Note: For some accounts, sections like backup location and mirror path will not be available.
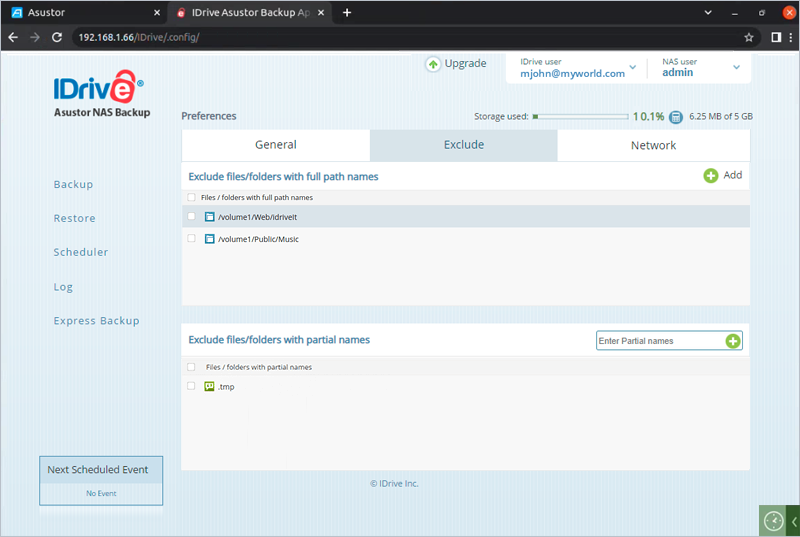
Can I exclude certain file(s)/folder(s) from being backed up?
You can exclude file(s)/folder(s) from being backed up during manual and scheduled backups in two ways:
Exclude files/folders based on full path name
Exclude files/folders based on partial name
To exclude files/folders based on full path name,
Login to the Asustor Backup App.
Click the username on the top-right corner, and then click 'Preferences'.
Select the 'Exclude' tab.
Click next to 'Exclude files/folders with full path names'. The 'Add files/folders to your exclude list' window appears.
Select the files/folders to exclude and click 'Add to Exclude List'.
To exclude files/folders based on partial name,
Login to the Asustor Backup App, click the username on the top-right corner, and then click 'Preferences'.
Click the 'Exclude' tab and enter partial names of files/folders in the 'Enter partial names' section and then click .
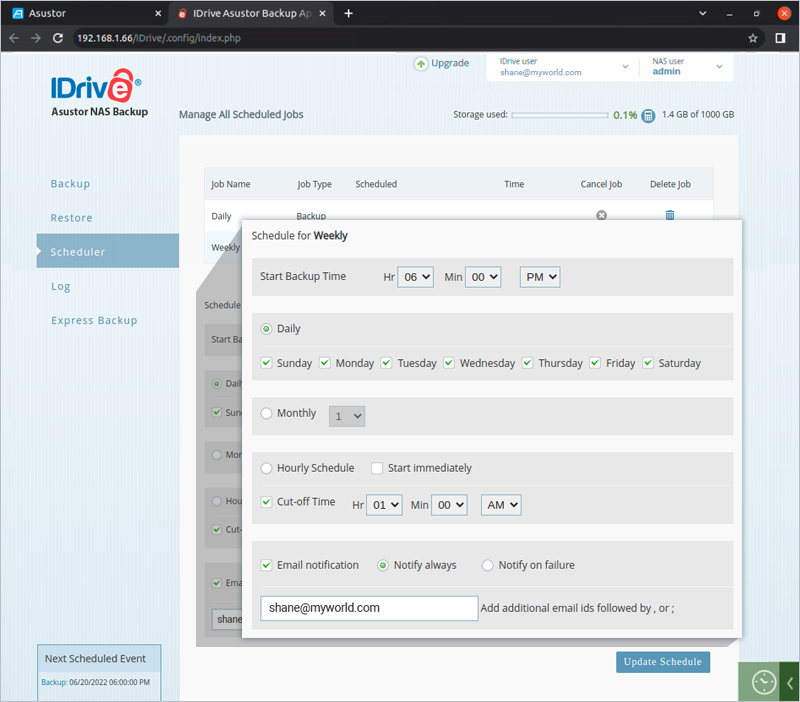
Can I stop my scheduled job at a particular time?
Yes, you can stop your scheduled job at a particular time using the 'Cut-off Time' option.
To stop your scheduled job,
Click the 'Scheduler' tab and then click the job you want to update.
The 'Schedule for job' window appears.
Enable the 'Cut-off Time' option and set the time you want the job to stop.
I need to update my backup set content for a job. How can I do that?
To update backup set content for a job,
Click the 'Backup' tab.
From the 'Backup Set Name' drop-down list, select the backup set you want to update.
Select the file(s)/folder(s) you want to add.
The selected file(s)/folder(s) will be added to that existing backup.
Note: For some accounts, certain functions like new folder/rename are not available, and drop-down list to select the bucket will be available.
Can I check whether my job is running or not?
Yes, you can check whether your job is running or not.
To check the status of your job,
Login to the Asustor Backup App and click the 'Log' tab.
Under 'Status' you will see the different states of a job:
'In Progress' indicates a particular job is in progress.
'Success' indicates all the files were successfully backed up/restored.
'Aborted' indicates the backup/restore job was cancelled by user.
'Failure' indicates some/majority of the files were not backed up/restored.
Note: Click the 'Scheduler' tab to check the status of your schedule jobs.
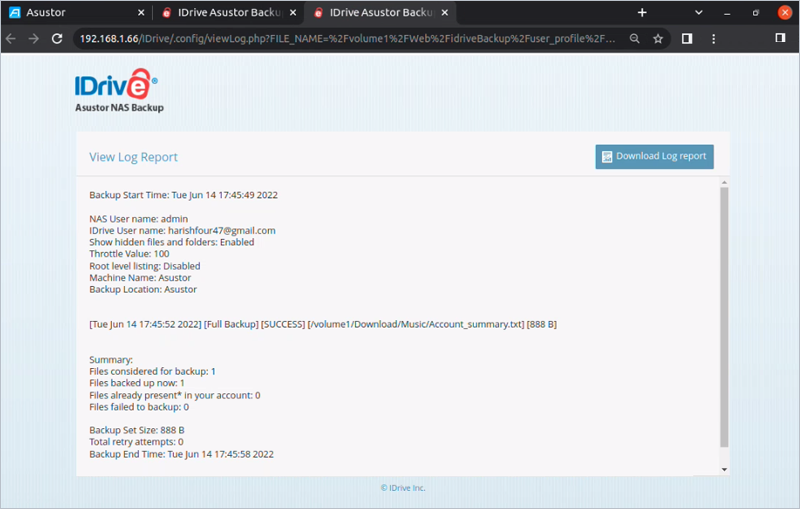
Is it possible to check the number of files backed up or restored for a finished job?
Yes, you can check the number of files backed up or restored for a finished job at any time.
To check,
Click the 'Log' tab and the 'Logs' window appears.
Under 'Details', click for a particular job and the 'View Log Report' screen appears.
Under the 'Summary' section, you can view the number of files backed up or restored.
Click 'Download Log report' to download the log file.
Can I check the quota usage for my IDrive® account?
Yes, you can check the quota usage for your IDrive account.
To check,
Login to the Asustor Backup App and click .
The quota is calculated and the percentage of 'Storage used' is displayed.
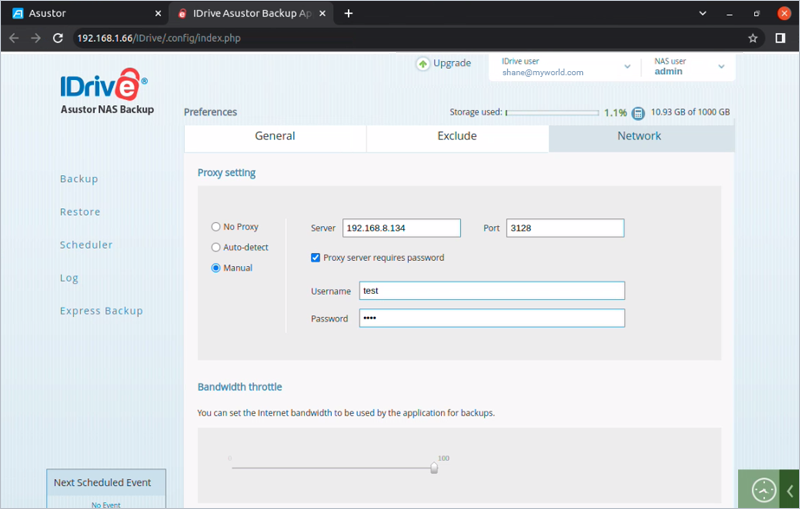
If I am connected to a Proxy Server, will the Asustor Backup App work?
Yes. If your Asustor Device is connected to the internet through a Proxy Server, you can configure the Proxy Server settings on the Asustor Backup App.
To configure proxy settings,
Login to the Asustor Backup App, click the username on the top-right corner, and then click 'Preferences'.
Click the 'Network' tab and the 'Proxy Settings' window appears.
Select 'Manual' and enter the proxy Server IP and port number.
Select 'Proxy Server requires password' if your proxy server requires password authentication and enter the 'Username' and 'Password' for the proxy server.
Note: Select 'Auto Detect' for the IDrive Asustor App to automatically detect the Proxy settings.
How do I make sure my backup is working fine, if the log file shows 'Quota over limit' message?
If logs are showing 'Quota over limit' message, it means your account has exceeded the storage space limit and you need to upgrade your account to a higher storage plan. Click 'Upgrade' in the IDrive App to upgrade your account.
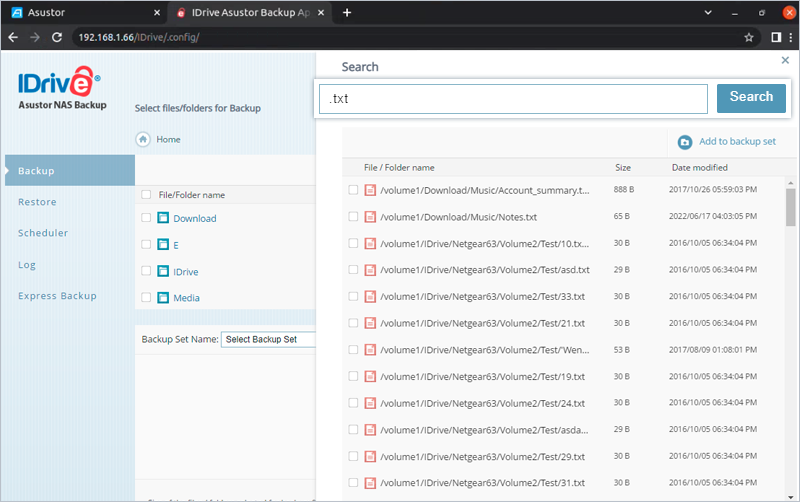
How can I search for files/folders on my computer, using the IDrive® Asustor app?
To search for files/folders present in your computer,
Click 'Search' under the 'Backup' tab. The 'Search' screen appears.
Enter the full or partial file/folder name in the 'Search' field.
Click 'Search'. A list of files/folders matching the search criteria is displayed.
You can use the 'Search' feature to exclude individual files/folders (for e.g. file extension like tmp), which may be part of the backup set, from being backed up to your account. Just search for the files and folders, and from the search results that appear, click the drop-down arrow against the respective file/folder and click 'Add to Exclude List'.
How can I search for files/folders in my IDrive® account, using the IDrive® Asustor app?
To search for files/folders backed up to your IDrive cloud account,
Under the 'Restore' tab, select the 'Restore files from my IDrive account' radio button, and click 'Search'. The 'Search' screen appears.
Enter the full or partial file/folder name in the 'Search' field.
Click 'Search'. A list of files/folders backed up to your IDrive account is displayed.
From the search results, you can share files and folders, rename them, add them to the restore set, and view their details.
Note: For some accounts, certain functions like new folder/create new restore set/rename are not available, and drop-down list to select the bucket will be available.
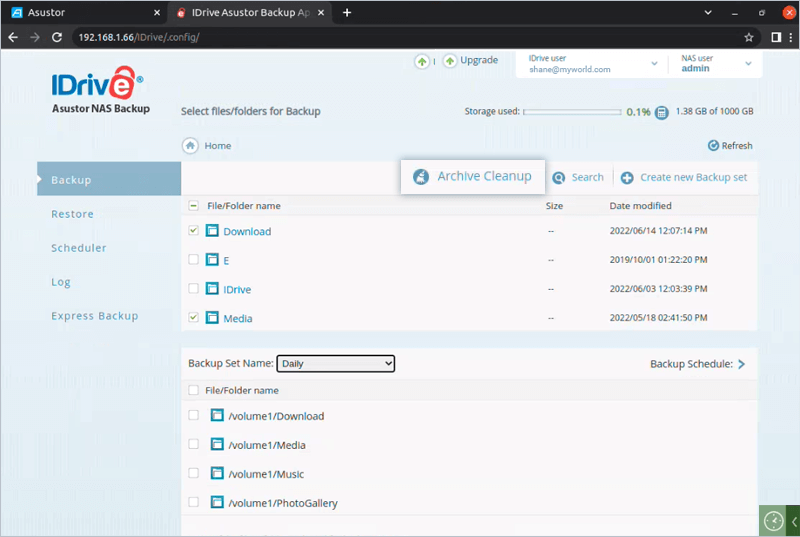
What is meant by Archive Cleanup?
Archive Cleanup does a one to one match of the local data in the backup set selected for cleanup with your account files, and permanently deletes data from your account that no longer exists on your NAS device. This frees up space in your IDrive account.
By default, Archive Cleanup considers 25% of files for deletion. You can also regulate the percentage according to your preference.
Note: Archive/Periodic Cleanup is not supported for relative path. Archive Cleanup menu will not be visible if relative path is selected. Manual/periodic Cleanup cannot be initiated when manual/scheduled backup is in progress.
To start archive cleanup manually,
On the 'Backup' tab, select the backup set for which you want to run the cleanup operation.
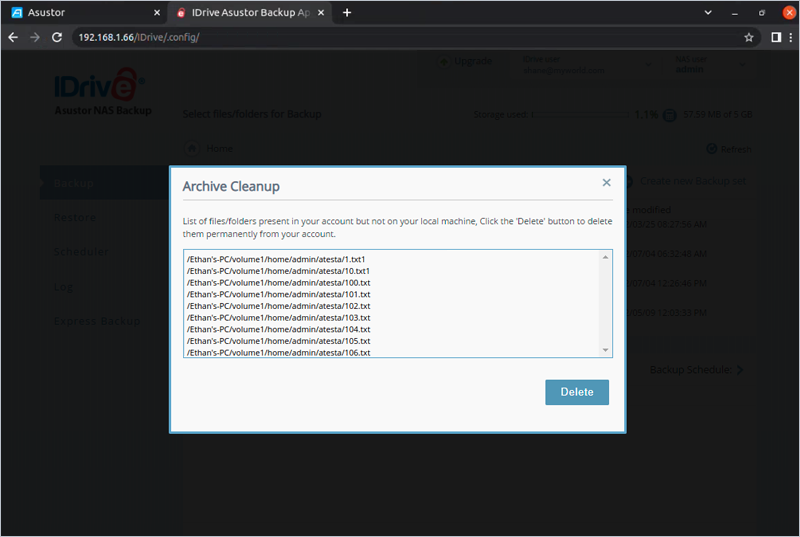
Click 'Archive Cleanup'. The 'Archive Cleanup' window appears.
Select the required percentage for cleanup, and click 'Cleanup Now'.
IDrive will scan all the backup set files/folders in your account and will generate a list of items to be deleted from your account. If you want to delete all the files mentioned in the list, click 'Delete'.
In case you want to cancel the operation, click .
What is meant by Periodic Cleanup? How can I enable it?
Periodic Cleanup, once enabled, automatically deletes files at the frequency set by you for the selected backup set.
You can set the frequency between 10 and 30 days and percentage of files for cleanup between 5% and 25%.
To enable Periodic Cleanup,
On the 'Backup' tab, select the backup set for which you want to run the cleanup operation.
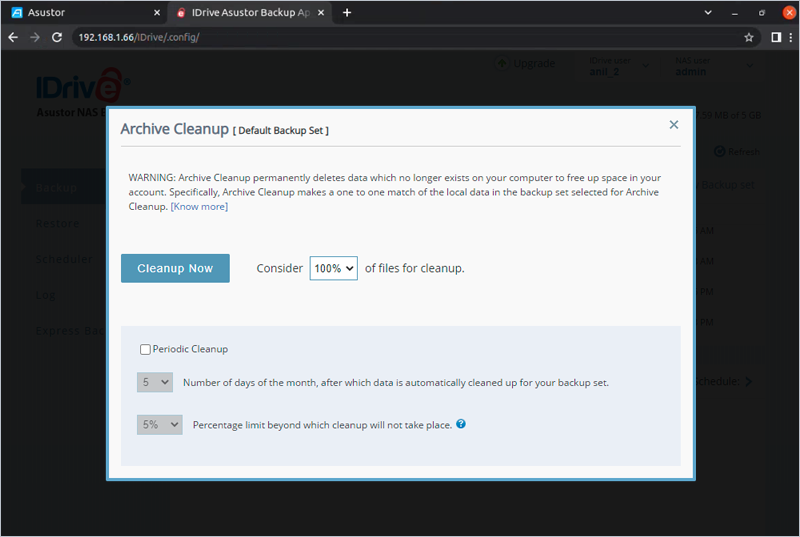
Click 'Archive Cleanup'. The 'Archive Cleanup' window appears.
Check the 'Periodic Cleanup' box.
Set the number of days and percentage of data to be considered for cleanup.
What shall I do, if the application displays an error 'Failed to create directory'?
If you get an error that says 'Failed to create directory', make sure that you provide read/write permission to the 'Web' folder for the 'users' group.
Provide 'Read/Write' permission to the folder 'Web' and click 'OK'.
How can I retrieve previous versions of my backed up files?
Currently IDrive retains up to 30 previous versions of all the backed up files. However for accounts created prior to 11-07-2018 up to 10 versions can be restored.
To restore previous versions of a file,
Click the 'Restore' tab, select the 'Restore files from my IDrive account' radio button, and hover over any file in the list.
Click on the right side of the list.
Click the 'Version' menu. All available file versions will be displayed.
Select the required previous version of the file and click 'Restore'.
If I need to send error reports to IDrive® support, how can I do that?
To send error reports,
Login to the Asustor Backup App.
Click the username on the top-right corner, and click 'Send Error Report'.
Fill in the required fields and click 'Send'.
When I am logging in to my IDrive® account for the first time on a new Asustor machine, it is asking me to select location/computer for backup. Why?
IDrive lets you restore backup archive of your previous computer on your new computer. You can select the 'Adopt/Link to an existing location/computer' option for this after logging in. In case you are replacing an old computer you can reconnect to the previous computer's backup archive. By adopting the previous computer's backup archive, you can avoid time consuming initial backup of your files.
To adopt your backup archive,
Install the Asustor backup app on your NAS machine and login to Asustor Backup App.
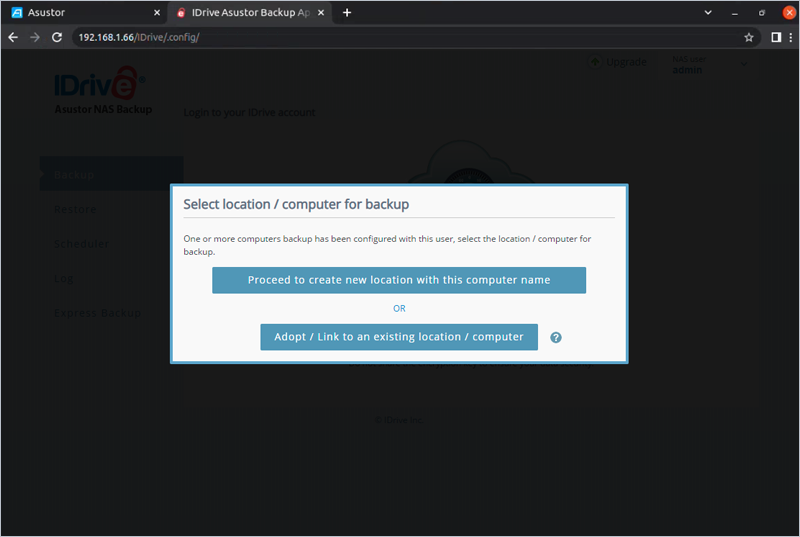
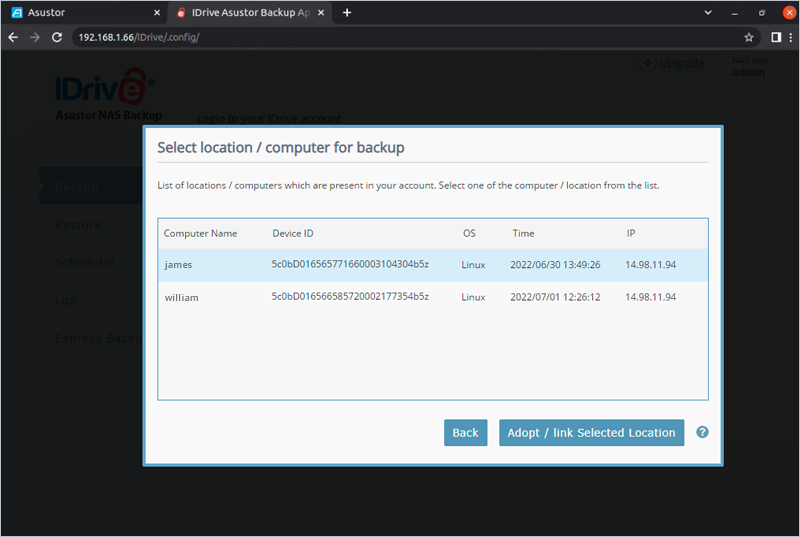
Click 'Adopt/Link to an existing location/computer' when prompted to select location/computer for backup. A list of locations/computers linked to your account appears.
Select the desired computer/location from the list and click 'Adopt/Link Selected Location' to restore your previous backups.
If you do not want to adopt your previous backups on the new machine, you can click 'Proceed to create new location with this computer name' when prompted to select location/computer for backup.
Can I login to another IDrive® account while I am already logged in to the Asustor app?
Yes, you can switch from one IDrive account to another.
To switch accounts,
Click the username on the top-right corner, and then click 'Preferences'.
Click 'Logout' in the 'IDrive Cloud Account Credentials' section.
Enter the other account credentials and click 'Login'.
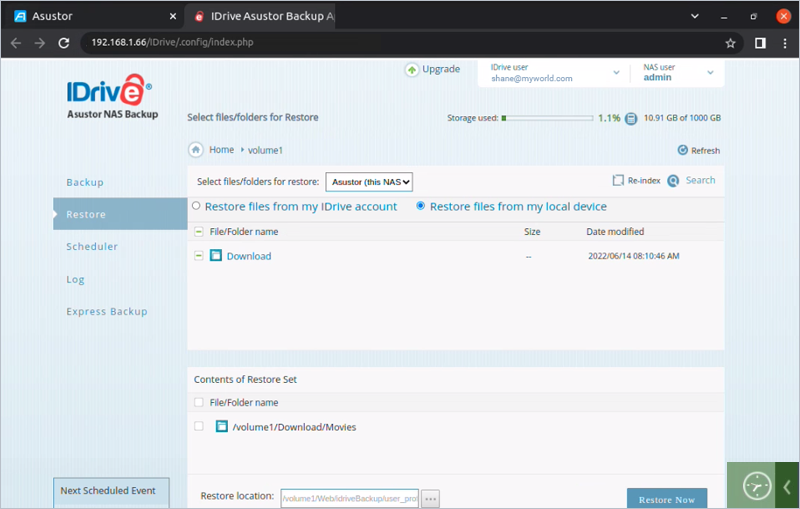
I am unable to view the data backed up to the Express device under ‘Restore files from my local device’ section in the ‘Restore’ tab. What should I do?
All files backed up to the Express device appear under the ‘Restore files from my local device’ section in the ‘Restore’ tab of your Asustor Backup app. In case you are unable to view data backed up to your Express device, then you can run ‘Re-index’ operation to re-generate the file/folder list of all backed up data.
Note: When Re-index operation is in progress, you will not be able to perform local restore/express backup.
Can I backup data to the Express device without internet connectivity?
Data backup to the Express device does not require an active internet connection. If you are already logged in to the IDrive application then you can perform backup even without being connected to the internet.
Note: An active internet connection is required to login to the IDrive application.
Why is the CPU load becoming high while running backup/restore?
If you have enabled the 'Upload multiple file chunks simultaneously' option under 'Preferences' tab, the backups or restores will consume a little more load than expected. This is because the option speeds up data transfer by using multiple thread concept. You can disable this option if your machine resource utilizations are higher.
I am unable to create backup sets. Why?
If you have already created five backup sets you will not be able to create any more new backup sets further. In order to add a new backup set, you will have to delete any of the existing sets.
 .
.
 for a particular job, which is failed. The 'Detailed log' screen appears.
 next to 'Exclude files/folders with full path names'. The 'Add files/folders to your exclude list' window appears.
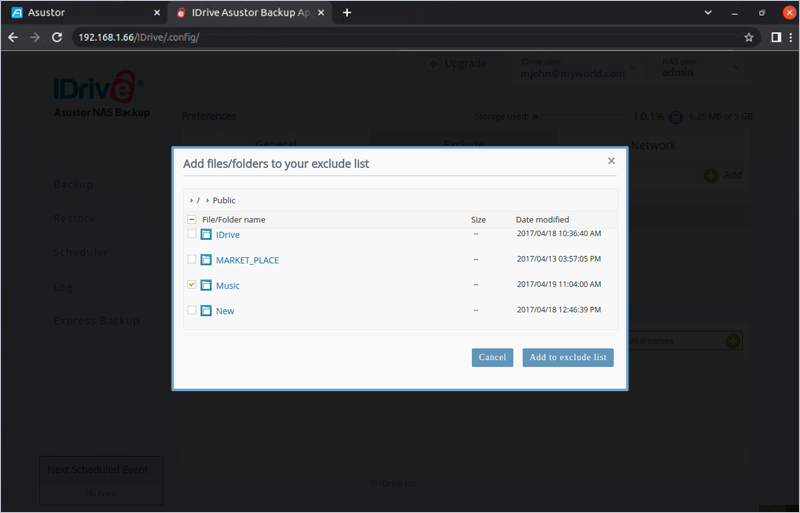
 and then click
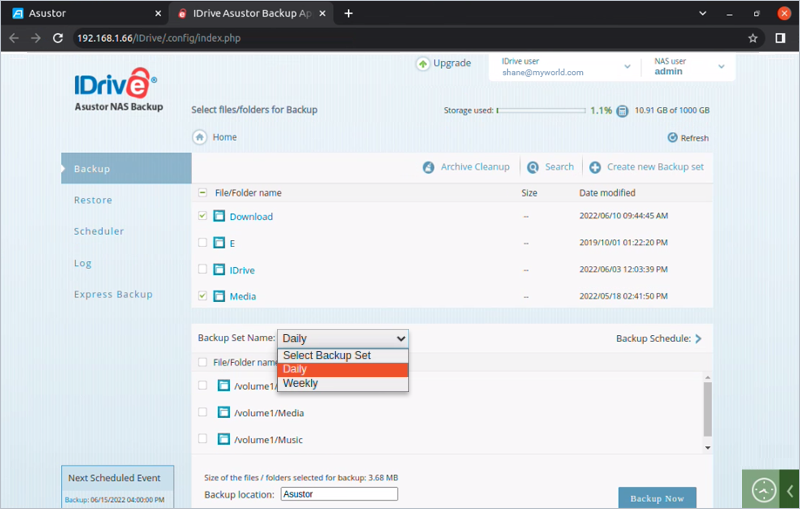
 .
.

 .
.